Navigation
Install the app
How to install the app on iOS
Follow along with the video below to see how to install our site as a web app on your home screen.
Note: This feature may not be available in some browsers.
More options
Style variation
-
Welcome to Tekno RC Forums! Are you a Tekno RC fan? If so you're in luck as you've have arrived to the biggest and best Tekno RC community.
Come join our community and ask your questions, show off your Tekno RCs and share your experience!
You are using an out of date browser. It may not display this or other websites correctly.
You should upgrade or use an alternative browser.
You should upgrade or use an alternative browser.
This site may earn a commission from merchant affiliate
links, including eBay, Amazon, and others.
links, including eBay, Amazon, and others.
TEKNOJ
Well-known member
- Messages
- 170
- Reaction score
- 64
- Thread starter
- #22
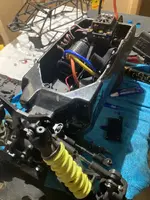
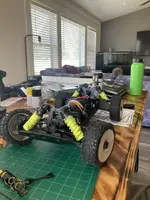
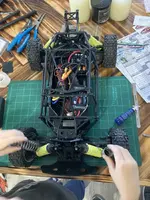
still need: the rear shock tower, 2 more universals/driveshafts, a couple 5052A's/ ball swivels, M2C droop screws, M2C esc tray, maybe a wing IDK yet.
need to do: relocate the esc, and figure out how to mount the body, make some rock/dirt guards for the opening in the front by the steering.
I CANT WAIT TO RIP IT AROUND!!!
need to do: relocate the esc, and figure out how to mount the body, make some rock/dirt guards for the opening in the front by the steering.
I CANT WAIT TO RIP IT AROUND!!!
TEKNOJ
Well-known member
- Messages
- 170
- Reaction score
- 64
- Thread starter
- #24
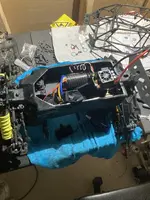
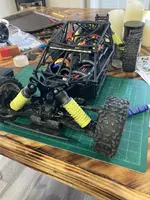
That’s just a trial run, but it fits under the tenacity cage and will keep debris out of the chassis. I’ll do some more fit up this weekend once my rear tower gets here. I will also figure out how to mount the esc above the center diff, using some materials I have on hand. More to come, stay tuned.
TEKNOJ
Well-known member
- Messages
- 170
- Reaction score
- 64
- Thread starter
- #28
I will post a pic of my setup sheet.
Anyway here’s how I get my badhorsie shock socks on with ease....
Step1: push your sock on there a bit and begin to “thread” the spring into the sock
Step2: thread it all the way in leaving about an equal amount of sock at each end.


Step3: tuck the ends into the spring.

Comes out looking professional
Anyway here’s how I get my badhorsie shock socks on with ease....
Step1: push your sock on there a bit and begin to “thread” the spring into the sock
Step2: thread it all the way in leaving about an equal amount of sock at each end.
Step3: tuck the ends into the spring.
Comes out looking professional


TEKNOJ
Well-known member
- Messages
- 170
- Reaction score
- 64
- Thread starter
- #35
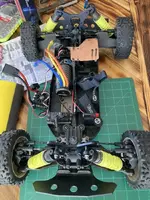
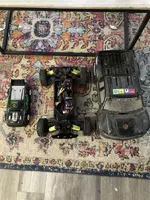
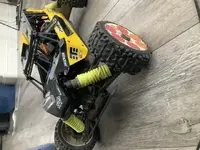
Also got my rear cage/body mount came in. I’ll get it installed tonight and post up some pics. Surely though, this buggy won’t look complete until I get some new wheels n tires.
This cost me about $19 after shipping. I have plenty of aluminum n such, but since I have a brand new engine in the garage that’s awaiting my attention, I chose to buy this and not get grinder dust everywhere since that’s what I would be cutting with. And a piece of kydex was going to cost just as much in the thickness I wanted. I think the side to side rocking will cease once I get the wing portion attached somehow.
Last edited:

TEKNOJ
Well-known member
- Messages
- 170
- Reaction score
- 64
- Thread starter
- #38
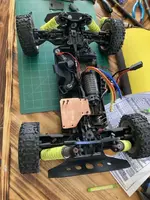
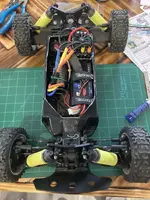
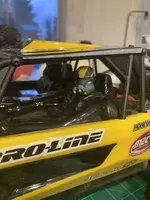
I thermoformed the stock esc mount plate into a 90* to use as the front body post mount. Then used some m4 screws as the posts cinched down with some locknuts. When I drop down the body I use some more m4 locknuts with the body washers that came with the tenacity body kit, and also the old shock cartridge spacer pieces since I upgraded to the delrin stuff. The shock spacers make the hole smaller.

TEKNOJ
Well-known member
- Messages
- 170
- Reaction score
- 64
- Thread starter
- #39
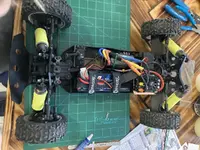
Instead of just using the center hole which I lined up with one of the holes from the esc plate, I drilled 2 holes beside that so I don’t get that rocking effect like I do with the rear mount. It works well. Also backed those m3 screws up with a locknut to really sandwich that down.
