• Welcome to Tekno RC Forums! Are you a Tekno RC fan? If so you're in luck as you've have arrived to the biggest and best Tekno RC community.

    Come join our community and ask your questions, show off your Tekno RCs and share your experience!

Overpowered ET48 2.0 Build

This site may earn a commission from merchant affiliate
links, including eBay, Amazon, and others.
I use this on my builds that run a long TP4070.
https://www.ebay.com/itm/332787511241
Trim off the CD mount from it and then mount it on the rear of the motor. You will need transfer screws to mark your hole locations on the chassis. No matter what the landing is the motor will not move.
That looks like a great solution, thanks for sharing! There's not as much clearance between the chassis and the motor on the 2.0. Maybe 2mm versus like 6mm on the .3 platform but I think I can make this work.
 
Look up RC boat motor mounts there are some great options in alum and CF with more then enough adjustability to suit most installs it what I used in speed runners, obviously if jumping your rig then the flex can cause issues with a dual mount.

I did look into a motor brace which was two motor plates back and front with bars along the side of the motor so held the can rigid to the motor mount and supported both ends but allowed chassis flex!
Never came to anything as I ditch the plan and just brought an X-Maxx to basher the hell out of 😈
 
That looks like a great solution, thanks for sharing! There's not as much clearance between the chassis and the motor on the 2.0. Maybe 2mm versus like 6mm on the .3 platform but I think I can make this work.
Its actually pretty thin on the bottom. I have a thin piece of kydex under mine.
 
Its actually pretty thin on the bottom. I have a thin piece of kydex under mine.
Yeah I did a test fit, looks like it'll work great. I'll need to get my gearing setup perfect before I drill the chassis. Thanks for the recommendation, I think I can use the extra holes on top for another device like a volt meter or motor temp sensor.
783690CD-3268-43F4-9AAC-858092FA4461.jpeg


Fixed it up and ran the taller 6s Backflips on 22/44 gearing.
3DF20255-A8D1-43A2-B19B-4B84AEF893C4.jpeg


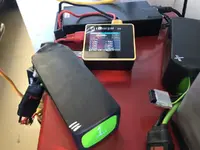
Using a volt meter since I'm having a battery issue. The Turnigy 6s packs don't run too hot but they do fall out of balance at lower voltages. Throughout the run they'll hold their balance just fine but once the cells hit about 3.4V the balance goes way out of wack. I read 2.9v on some cells and 3.2v on others at the end of runs. This happens to all 3 batteries. One actually came from the factory with a cell .7v lower than the others, which I got warrantied and was actually able to bring back to balance, so basically got a free battery.

Max ripple voltage is 7% (1.52v) which is definitely still acceptable and safe.

Took the IR readings and for all three batteries I found that the resistance is about 1 milliohm or less on every cell except cell 1, which is at 5 milliohms. Kind of odd, maybe a connection problem between charger/battery? Attached the readings in case anyone is interested or has any input.
6CE95B40-DAA9-4045-BF35-819867D82E98.jpeg


Tested these massive QS8 connectors. They're difficult to solder since the bullets are so large. I found that the fastest way of soldering them is to stick the tip of the iron into the bullet and build up a pool of solder. Melted a couple of them while soldering actually.
B54AC950-36A7-49B2-985F-637CD0AEB703.jpeg


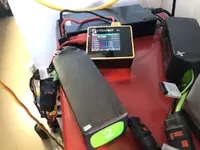
QS8 next to XT90. The QS8s weren't even warm after 3 battery packs. I noticed the batteries ran about 10 degrees cooler as well. I'll keep them.
A85E5CE3-E781-46ED-91C1-5E4005B5C7FD.jpeg

EA2ACFB2-4553-4A6B-B9F5-9F9DB78A1C01.jpeg


Logs from 3 back to back packs. Made 8 HP (6,044 Watts) of power from 25.3v pulling 269.4A. Comes out to 89% efficiency. Pretty solid. I think I can push this setup to 10HP for short speedruns.
1816E7AE-EBBB-432E-A5D5-72AFC3191B02.jpeg


Max motor temp was a bit high, 170F after full throttle for nearly 5 minutes. I got a few 140F and 150F readings on the later packs. Motor is really solid as long as I'm not flat out the whole run, which is good for me.
 

Attachments

  • 398AFC92-BF9D-4F77-BADB-47C2A8CD0547.jpeg
    398AFC92-BF9D-4F77-BADB-47C2A8CD0547.jpeg
    91.9 KB · Views: 199
  • D2B0F473-BFDD-4F8F-8D96-996A5942D60C.jpeg
    D2B0F473-BFDD-4F8F-8D96-996A5942D60C.jpeg
    99.7 KB · Views: 174
  • D75474D6-5B67-4811-915E-25761146197C.jpeg
    D75474D6-5B67-4811-915E-25761146197C.jpeg
    91.5 KB · Views: 211
Have you been bashing this setup at all? Have you been bending your batteries? Does the battery protector you made hold the batteries flat or does it lift it on one end? Thanks I'm just trying to come up with a solution for a longer battery pack.
 
Have you been bashing this setup at all? Have you been bending your batteries? Does the battery protector you made hold the batteries flat or does it lift it on one end? Thanks I'm just trying to come up with a solution for a longer battery pack.
Yeah I've put about 10 packs through it. No problems with batteries getting damaged. The packs don't sit flat but you could make the protector to keep them flat. It's just a piece of nylon I bent using heat, and cut/drilled with a dremel. You could make something like this really easily in whatever configuration you need.

Honestly there's not really much space at all for longer batteries. Just a few mm if you red-rill the holes for the braces. Gotta get the right sized batteries. SMC makes a hardcase 6s that would fit in the stock tray no mods required.

https://www.smc-racing.com/index.php?route=product/product&path=67_119&product_id=440

The round end on the Turnigy 5000mAh batteries I use just sticks out a bit so the protector isn't for extending the tray, just keeping the batteries from getting chewed up by the CD outdrive.
 
Last edited:
Made a front bumper using the same 1/8" nylon 6/6 plate. This stuff is really useful. I made the front section removable to turn it into a less obtrusive skid plate if needed. Using M4x25mm and M4x20mm flat head stainless screws in place of the stock screws.
F6D7B557-959D-4B7A-8456-4DD43A64CA7E.jpeg


Front
A6FBEE00-5CFA-4013-A374-D5C624058B4B.jpeg


Rear
00B2B33D-D0EA-40E7-A8E4-CE2E7B9C9C3D.jpeg


The Redcat motor mount works great for supporting the rear end. I cut off the CD section and de-anodized it using some oven cleaner. Polished and mounted it up. I haven't drilled any holes in the chassis to fully secure it since I'll be changing around the gearing. Even without fully securing it to the chassis it still provides lots of support. More so than the o-ring solution since this doesn't flex.
04328D7F-C52C-42F4-9B0A-1EB15542D1E9.jpeg
43D580FA-2ED1-4F5D-8096-E4023983CF72.jpeg


Also mounted up a SkyRC GPS. 64mph on a quick pass outside of my house with a mostly dead battery.

22/44 gearing, 6s, 1520kV, 170mm tall tires.
 
Last edited:
Been having temp issues with the TP4070. Gets up to 190F in 3-5 minutes regardless of gearing or tires. Driveline is super smooth. Took a look at the data logs.
4ECDCB96-DE2B-4BF2-A9C0-40B25447C485.jpeg


Did some maths. Efficiency dropped to 80% (90% previously). Made 8.7 peak HP still.

It got up to 230F a couple of weeks ago not running too hard. I'm assuming that permanently damaged the motor. But it shouldn't have gotten so hot regardless. It's geared for about 80 mph. I see many people run these motors at 100+mph repeatedly on heavier cars. Decided to practice de-anodizing the end caps since I’m replacing this motor anyways. Came out solid. Also lightened it up by remaking the ESC plate, removing all of the wire braiding/motor fan setup and removing the front bumper.
CB3275BE-5B0E-4464-AB38-CC76A7265429.jpeg
BDE52E5E-5E8C-4BD8-B9F8-64548728CE10.jpeg


Put in an order for a cordova 1440 2000kV. Should be a solid upgrade.
 
Last edited:
Been having temp issues with the TP4070. Gets up to 190F in 3-5 minutes regardless of gearing or tires. Driveline is super smooth. Took a look at the data logs.
View attachment 7067


Did some maths. Efficiency dropped to 80% (90% previously). Made 8.7 peak HP.
View attachment 7068


It got up to 230F a couple of weeks ago not running too hard. I'm assuming that permanently damaged the motor. But it shouldn't have gotten so hot regardless. It's geared for about 80 mph. I see many people run these motors at 100+mph repeatedly on heavier cars. Decided to practice de-anodizing the end caps since I’m replacing this motor anyways. Came out solid. Also lightened it up by remaking the ESC plate, removing all of the wire braiding/motor fan setup and removing the front bumper.
View attachment 7070View attachment 7069

Put in an order for a cordova 1440 2000kV. Should be a solid upgrade.
Did you check / replace motor bearings?

230F will cook the grease in the bearings and make them vulnerable.
 
Did you check / replace motor bearings?

230F will cook the grease in the bearings and make them vulnerable.
Yeah they were good. Don't really know why it got so hot. It's not overgeared or too heavy of a setup. 6s 1520kV and a long motor should hold up fine to hotter days and taller gearing. I''ll check wiring joints, maybe my soldering was faulty.
 
Have you been bashing this setup at all? Have you been bending your batteries? Does the battery protector you made hold the batteries flat or does it lift it on one end? Thanks I'm just trying to come up with a solution for a longer battery pack.
Remade the battery guard. Took like 20-30 mins with a dremel and some hand tools. This one keeps the battery flat. Sandwiched between the side battery braces and the chassis using the stock screws.
1F56E864-3771-4AAA-8D75-A019ADB0C96F.jpeg


Dremeled 1-2mm off of the side braces and the Turnigy Graphene 6s 5000mAh battery no longer squeezes in. It fits perfectly snug. Cut out a section for the Power wires and chamfered the edges to avoid chaffing wires or the velcro strap.
6DA88D92-9DF0-4A80-8D31-F03E014BE2B5.jpeg

Mounted. About 3 mm clearance from the CD outdrive. Also tossed in the Rocket Motor. Working on a video.
61D23847-4BF9-4F4B-9240-C04D8E329C5B.jpeg


LFR body and Cordova motor are in the mail, should be a fun weekend.
 
Last edited:
Remade the battery guard. Took like 20-30 mins with a dremel and some hand tools. This one keeps the battery flat. Sandwiched between the side battery braces and the chassis using the stock screws.
View attachment 7082

Dremeled 1-2mm off of the side braces and the Turnigy Graphene 6s 5000mAh battery no longer squeezes in. It fits perfectly snug. Cut out a section for the Power wires and chamfered the edges to avoid chaffing wires or the velcro strap.
View attachment 7084
Mounted. About 3 mm clearance from the CD outdrive. Also tossed in the Rocket Motor. Working on a video.
View attachment 7083

LFR body and Cordova motor are in the mail, should be a fun weekend.
Wow that is such a great design mate, what do you call the material that you're using?
 
Wow that is such a great design mate, what do you call the material that you're using?
Thanks ! I might whip up a template.

I'm using 1/8" thick Nylon 6/6.

https://www.amazon.com/dp/B0070ZDAPU?psc=1&ref=ppx_yo2_dt_b_product_details
This 12"x12" sheet was enough to make the battery guard, F/R bumpers and some other pieces. Totally worth the $20 if you don't mind spending some time working with it. Very useful stuff.

It's the same material that T-Bone uses for their bumpers, except it looks glossy at first. If you use some sandpaper or scotch brite on the surface then clean it, it looks exactly the T-bone stuff.
 
I'm looking forward to seeing some videos of this thing, it's awesome, really nice install and setup too, the car looks very good.

With my TP4060 1750kv running on a MMX ESC, I got a peak of around 5000w and 205 amps, that is crazy enough!
 
Last edited:
Thanks ! I might whip up a template.

I'm using 1/8" thick Nylon 6/6.

https://www.amazon.com/dp/B0070ZDAPU?psc=1&ref=ppx_yo2_dt_b_product_details
This 12"x12" sheet was enough to make the battery guard, F/R bumpers and some other pieces. Totally worth the $20 if you don't mind spending some time working with it. Very useful stuff.

It's the same material that T-Bone uses for their bumpers, except it looks glossy at first. If you use some sandpaper or scotch brite on the surface then clean it, it looks exactly the T-bone stuff.
Cheers for the link and info, I was eyeing off one of my old T-Bone bumpers to make something out of, but I'll have to get some of this sheet. Great pioneering work, the design looks really professional.
 
Fitting in a Cordova 1440, 2000kV
4A8CBA3B-10AC-4690-8AB4-818C010B4AA7.jpeg

FA14E832-206D-4E88-A846-3977DEE14E30.jpeg


Specs:
- 37.5mmx101.4mm
- 533 grams
- 8mm shaft with no flat spots
B72DD682-78A0-4235-8635-E104D884A6BE.jpeg

7CF7C13F-9E36-46A7-85B3-F344B7EDB446.jpeg

9CFE4DE4-DC61-45B8-9540-965004DA9BC6.jpeg


Smaller and lighter than the TP4070 (40x107, 613g). Odd, others have noted that the Cordova 1440 was the same size and weighed more than the TP4070. Seems like Cordova downsized and downgraded the 1440 line.
https://www.rctech.net/forum/showpost.php?p=15042198&postcount=634
0BA63BC9-DB1A-47D3-8931-54CCE41D808D.jpeg


Will still be testing this to see how it compares to the TP4070 at $150 cheaper. Hopefully better lol, but I don't have high hopes.

Using SagaRC 8mm bore Mod 1 pinions.
Dremel two divots on the motor shaft, 90 degrees from eachother.
7F49B794-9EE9-4CA3-83E7-0DA465C3B607.jpeg


The pinions need to be mounted in this orientation since they won't fit inside of the motor mount insert.

You need M3x9MM screws to mount the motor. Very important that the mounting screws don't extend past 5mm into the motor. Mounting plate thickness is 4mm.

Use M4 knurled set screws for extra security. The teeth on the set screw will bite into the divot on the motor shaft. Orange loctite.
264FCA99-2495-445F-A2A4-3D4B14EED3D7.jpeg


Mounted up. The redcat motor mount support won't work since the Cordova 1440 is 37mm. Instead use a series of o-rings to support the rear. These are 36x5mm and work great. McMaster Carr #1302N799.
75006AD9-761B-4E67-8FB6-AAB1EF2D4BB1.jpeg


Stock ESC fan broke a blade. Replaced with a 40mm Maclan aluminum fan. Any similar fan will be an improvement.
4C828804-F51E-4983-83DF-CB5A1A6A6C20.jpeg


Realized that rotating the body post mounts forward allows the body to fit properly. No more rubbing on the towers. You can use ET48.3 or NT48.3 bodies with no mods by doing this.
9C4A11D2-9DD3-4222-833C-F9C7EA63D658.jpeg
 

Recent Popular Liked

Back
Top