Motorider
Member
- Messages
- 7
- Reaction score
- 9
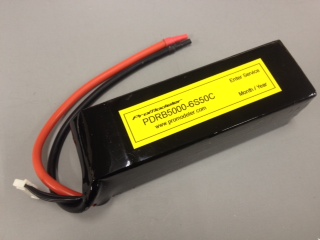
I can not take credit for the knowledge I am about to share. The article was written by John Beech at promodeler.com. great guy and the best customer service in the industry. He answers his phone on Sundays. Anyhow here is a copy to the page where I'm getting this info from. I am also copying his page. He has permitted me to do so. He also sells batteries at a good price. I personally will be trying a few on my next order.
http://www.promodeler.com/askJohn/How-To-Care-for-LiPo-Packs
This is some of the best information I could find on the net. I have lived by it since I got back into the hobby and it has served me well.
DYK - how to care for LiPo packs?
Q. DYK (do you know) the best way to take care of LiPo batteries?
A. You're smart to wonder because how you treat your LiPo packs (Lithium Polymer chemistry) makes all the difference in the world. Mistreat them and you'll be lucky to manage a few dozen cycles (a cycle being one charge/discharge). Treat them right, and they may last 100-300 cycles - or more! How to treat them right, or the best practice for the care of LiPos involves 3 rules of thumb.
Beyond a battery and something to consume the charge (your model), you're going to need a a few pieces of gear. These include a charger, a watch, plus a timer, as well as a watt meter. Transmitters usually have a timer incorporated, so break out the manual if you don't know how to use it because they're valuable. If you don't have a watch, use your cell phone to see the time (and note, smart phones have timers, too). Another piece of gear you'll want is called a watt meter. This is a relatively inexpensive device but invaluable as you'll learn.
Anyway, along the way we'll discuss features you may want in a charger so this article will to a certain degree inform you regarding charger features to ensure your charger has because they all don't have the same features.
3 rules-of-thumb for best practice
Don't discharge beyond 80% of rated capacity
If you fly or drive the model until it slows down noticeably you've almost certainly discharged the battery pack below 80% of capacity . . . and broken Rule of Thumb #1. This is bad because the battery gets hot when it's abused this way (and in general, heat is bad for batteries). The trick of not using more than 80% of a battery pack's capacity is to know approximately how much capacity you're using. Yes, this seems obvious but it isn't all that easy to know the answer.
A fuel gauge for your battery would be dandy. And if you're made of money, there are telemetry systems available from various radio manufacturers, which down-link pack info to your transmitter. This very nice, but what if you don't have such a system?
Fortunately, pack consumption can be estimated with a timer plus a charger, if the charger also informs regarding how many milliamps it replaces into the pack. Thus, in addition to buying a charger that will handle 8-cells if you operate models with 8-cells, an important feature is a readout regarding the number of milliamps the charger puts back into the battery pack. Bonus points if it breaks this information down cell-by-cell.
Armed with this information (number of milliamps returned to the pack) plus a watch to time your flights between take off and landing, you can determine if you're using more or less than 80% of pack capacity. Why the watch? Simple, if you flew 4 minutes and only used 50% of the pack's capacity you can set a timer in your transmitter to sound the alarm when it's time to land, perhaps allowing 30 seconds to land, and set it to 5:30. This will have you reasonably sure you won't break rule #1.
What if you want to fly longer? Simple, set the time to an extra minute and see how many milliamps are being put back in. If this is now 70% instead of 50%, you may be close enough, but you could add another 30 seconds to the timer and see if that puts you spot on the 80% mark. Now it becomes a game of how close can you get. Just don't exceed 80% because it degrades the battery and the number of cycles it will deliver will plummet. You've been warned.
Stop the recharge at 95% of capacity
Left to their own devices, a charger will peak the battery for 100% of capacity. Thing is, if you tell it to stop the charge at 95% capacity you get a bit less into the pack but it happens a lot faster than waiting for 100%. And it also doesn't abuse the battery as much. Our best advice is sacrifice that 5% for the greatly extended lifespan of your LiPo pack. Trust us temp-on this and just do it. Thus, a nice feature of your charger is the ability to tell it when to stop the charge. This can be either in % - or - in volts/cell. In a LiPo, 95% -$2= 4.15V/cell. How do you know this? Simple, just consult the chart below. Heck, maybe you'll want to print it out and tape it to your field box!
Store packs at 3.80V/cell
Another important feature in a charger is a storage cycle. Basically, it'll charge or discharge whatever pack you connect until it attains a set point measured in volts/cell. Often the desired value for storage is 3.80V/cell, but if you want to fine-tune this number, another feature to look for in a charger is the ability to set this value. Once again, consult the chart below.
Watt-meterMany folks use a Watt Meter and get an indication of the pack
voltage under load. This can be handy when determining how the pack
is standing up to use, or for determining when a pack is over the
hill, or whether the pack has a high enough C-rating for the purpose.
Fortunately, there's a poor man's way of determining a pack's state
of charge, or remaining capacity - and all you need is a digital
voltmeter plus this handy chart.

- Determine LiPo battery pack remaining capacity by measuring at rest voltage
Using the chart to determine the state of charge is easy. Simply measure the voltage after the pack's been at rest a few minutes, then based on the number of calls, scan down until you find the measured voltage, and then scan left to see the approximate capacity in % that's estimated to be remaining in your LiPo pack. Oh, and please feel free to print this page for your workshop (it's 1400px wide so it prints out nicely). Maybe even laminate it for posting at the flying field for others. All we ask is that you please leave our copyright notice (as attribution of your source) so that anybody who wants to know who did the work of generating this chart can find us.
And before you ask why cells rated at 3.7V can be charged to 4.2V, it's because the calls are rated at their nominal voltage, e.g. the approximate voltage they see under load. For the state of charge to be reasonably accurate, we need to measure unloaded voltage, and at rest, e.g. a brief period after it's been charged or discharged. Anyway, let's work through a few real world examples to help you learn what's important about the care and feeding of LiPo battery packs and how using this chart may help you.
A. Let's say you fly a 450-class helicopter with a 3S2200mAh battery pack (note, may be expressed as Ah, e.g. 2200mAh / 1hr = 2.2Ah). Calculating 80% of capacity is grade school math - it's just 2200mA x 0.8 = 1760mA. That's the max you want to use before recharging. Or put another way, you always want to leave 440mA in the pack (2200 - 1760 = 440). What follows is important because what you really want to know is; how long can I fly my model without discharging the battery pack too much? By rule of thumb, discharging below 20% of the capacity (440mA) is a no-no. The trick is to sneak up on the proper duration for that particular model based on how 'you' fly. Here's how.
Begin by setting the timer on the transmitter to a brief interval, like 3 minutes. Why not just fly the model until you feel the performance drop off and noting the time? Because by the time you can feel a reduction in power you've over-discharged the pack. And doing it even results in damage. Do it a lot and it becomes junk really quickly (and this is why you never, ever want to buy used battery packs, e.g. on the last day of a fun fly where there have been team pilots hammering on the packs whilst showing off a manufacturer's model and then offering the used packs cheaply because over-discharging is the kind of damage that's permanent and irreversible and leads to a significantly reduced lifespan for a LiPo battery pack – you've been warned). Anyway, after landing, wait a few minutes before measuring the pack-voltage. This is known as the 'at rest' voltage upon which the chart is based and waiting longer is better because the discharge process (or the charging process) disturbs the cells enough to affect things (but for our purposes, waiting a few minutes is good enough). Write the voltage down and recharge the pack.
While that's going temp-on, refer to the chart. Let's say you measured 11.6V (volts). Scan down to 11.61 volts (in the 3-cell column), then read left to where you'll see 60%. For confirmation; If the the charger says you've replaced 900mA, you're just about right temp-on the money because the calculation of 60% remaining capacity is 2200mA x 0.6 -$2$3$4= 1320mA, and 2200mA-1320mA = 880mA, or a bit less than half the capacity (e.g. you've used 40%). And 900mA is close enough to 880mA to call it good! Put another way, the state of charge of the pack is 60% remaining capacity.
If this were me, next I'd try increasing the timer to 4 minutes and go for another flight where I'd predict this time the charger would replace about 1200mA. Why? Because 900mA in 3 minutes is about 300mA/minute (900mA / 3min = 300mA/min). Based on that, then a 4 minute flight would likely result in replacing about 1200mA (300 x 4). If this holds true after measuring the at rest voltage and recharging, after this I'd try increasing the timer to 5 minutes and look for about 1500mA being put back in the pack. This, followed by a 6 minute timer setting. Anyway, if you land after 6 minutes and the charger says it's replaced 1800mA, you've gone a tad too far. Not enough to really damage the pack but you'd be smart to decrease the timer to 5-1/2 minutes. And note, experienced pilots pad the timer for the amount of time it takes them to set up and land. There's no one answer to this because, “it depends!”
So basically, through trial and error, you're going to zero in on the right amount of time you can fly any particular model based on how 'you' fly. Remember, the goal is discovering what flight time roughly equals 80%, or 1760mA (in this example) is being consumed from the pack because you don't want to over-discharge the pack. And never, never exceeding this is going to help you treat the packs right! Plus there's another benefit of sneaking up on the right duration - in the process you've been gently breaking in the packs. Yup, just like with an engine, battery packs benefit from a break in period . . . but that's a topic beyond the scope of this article.
Let's back up. What if you'd been impatient? What if you set the timer to 7 minutes because a buddy flies a similar model about that long on a 2200Ah pack? Well, at a rate of 300mA/minute you'd probably have used 2100mA. By consulting the chart, you'd see this was in the danger zone (marked in red). Yup, you'd have permanently damaged the battery pack right from the get go! This is why it's smarter to sneak up on the proper timer setting for each individual model based on how you fly it.
By the way, have you noticed how I keep mentioning how you fly versus how I fly, or how someone else flies? This is because most folks have a set routine when they fly. E.g. a particular series or types of maneuvers, which they typically like to perform. Thus, where one guy is happy to fly around in a race track pattern with an occasional roll or loop thrown in, another guy likes to fly straight up, then zoom down at full speed performing a low pass. The latter pilot is consuming more power more quickly, e.g. in less time. This means his timer setting or the exact same model should be different, e.g. adjusted for how he flies. Everybody is different.
Anyway, enough background on best practices for finding the 20% state of charge point. The real value of this chart lies in predicting the remaining capacity for a LiPo battery, e.g. before you charge it or store it away. Especially the latter. Why? It's because at the end of the day you want to have the pack at 3.80V/cell, or the optimum voltage for storage. This, because with experience we've learned storing a LiPo pack for the next time you want to go fly your model - at either a higher or lower voltage - leads to reduced service life (and the possibility of fire). And storing them fully charged isn't just dangerous because it may cause a fire but results in cells puffing. So to maximize service life and reduce fire risk, one of the rules of thumb is to always store the pack with the cells at the storage voltage. By the way, the state of knowledge about LiPo packs is always changing. I've read information by some very smart people indicating it may be better to store packs at 3.77V instead of 3.80V, and even 3.75V. However, until you know enough to be making these kinds of decisions, using 3.80V is my best advice. Meanwhile, here's another example where the chart is handy.
B. A guy with a crawler powers it with a 3S5000mAh pack. The fellow drives it until it slows down and wonders why he's having to frequently buy pricey battery packs. The guy at the hobby shop doesn't know (and maybe is happy selling packs). Fortunately, someone turns him temp-onto this article, he groks the idea, and he prints the chart to carry with him. Moreover, since it's his experience the truck slows down after about an hour of driving, after 45 minutes he stops, waits a bit, then measures the pack voltage. He discovers the pack's at 11.3V, or there's about 30% of capacity remaining (a state of charge of 30%). He wisely sets his transmitter's timer to 50 minutes, and after recharging he verifies he's indeed putting back about 4000mA (5000mAh x 0.8 = 4000mA for a 20% state of charge). Thus, by measuring resting voltage, then consulting the chart, he's now stopping when pack voltage is at 11.19V. But the chart is handy for more than this because it can help determine the health of the pack. Let's do another example.
C. A fellow has a model of a fighter jet with an 80mm impeller and flies it on a 6S5000mAh LiPo (a LiPo pack with 6-cells in Series that's 5.0Ah in capacity). From the chart he knows when drawing 80% of capacity it means the battery pack must have an 'at rest' voltage of no less than 22.38V (20%). He lands after 4 minutes and measures 22.26V and after consulting the chart sees this is in the yellow band. What's he do? Smart fellow that he is, he immediately resets his timer from 4 minutes to 3:45, recharges, and then goes out for another sortie. After landing, he measures 22.35V and again makes a timer adjustment, this time to 3:35 . . . yes, seconds matter. Later, driving home he ponders how he dodged a bullet because had he flown just another 30 seconds to a minute, he probably would have experienced a noticeable decrease in flight performance, e.g. he'd over-discharged the pack. And he'd probably encountered a battery pack that was more than warm, but downright hot from overly discharging it. And this last is an important detail. When you take the pack out of your model, feel the temperature with your hand. If it's hot, you're probably abusing it and/or need to use a higher C-rated pack (but again, this is information for another article so suffice to say, sometimes the simple things like feeling the temperature can give you valuable information). Anyway, had he over-discharged the pack he could have damaged something worth a couple of hundred dollars! Or put another way, he would have farted away some real money through carelessness. Permanently!
But there's more, because beyond learning where to set the timer for your model and landing immediately when it goes off, e.g. without dilly dallying, or making one more pass, but immediately setting up for landing, you're taking better care of your LiPo purchase! By the way, just like checking the battery temperature feels about usual after a flight, regularly verifying the timer setting is still correct (by measuring the at rest voltage vs. what the charger tells you it put back in) can help you predict when a pack is going over the hill. How? Simple, because it doesn't last as many minutes as it used to (and not just during one flight but when the voltage is consistently less than you've come to expect based on how you fly the model). Reduced duration when nothing else has changed may be the battery pack telling you it's done. Of course, if you're flying more aggressively than usual shorter duration may mean nothing in terms of pack health - it depends.
So let's say you determine the pack is 'tired'. Well, if you fly multiple types of models, this may be a great time to take a pack you've been using in a jet and re-purposing it into a sport model. Perhaps one with a prop where instead of draining it to 20% capacity in less than 4 minutes the model flies for 8 or 9 minutes. A more gentle discharge may be just what the doctor ordered. And re-purposed for a reduced duty environment, a pack may last a good while longer (e.g. when it's past its service life in a high performance model). Yet another example is how I've been using a 6S5000mAH pack that's way over the hill in terms of using it with a model, but it's been delivering yeoman duty for going on three years! Where? Strapped to the bottom of my 24V electric starter.
Bottom line? The chart is free, and using it can save you real money.
http://www.promodeler.com/askJohn/How-To-Care-for-LiPo-Packs
This is some of the best information I could find on the net. I have lived by it since I got back into the hobby and it has served me well.
DYK - how to care for LiPo packs?
Q. DYK (do you know) the best way to take care of LiPo batteries?
A. You're smart to wonder because how you treat your LiPo packs (Lithium Polymer chemistry) makes all the difference in the world. Mistreat them and you'll be lucky to manage a few dozen cycles (a cycle being one charge/discharge). Treat them right, and they may last 100-300 cycles - or more! How to treat them right, or the best practice for the care of LiPos involves 3 rules of thumb.
Beyond a battery and something to consume the charge (your model), you're going to need a a few pieces of gear. These include a charger, a watch, plus a timer, as well as a watt meter. Transmitters usually have a timer incorporated, so break out the manual if you don't know how to use it because they're valuable. If you don't have a watch, use your cell phone to see the time (and note, smart phones have timers, too). Another piece of gear you'll want is called a watt meter. This is a relatively inexpensive device but invaluable as you'll learn.
Anyway, along the way we'll discuss features you may want in a charger so this article will to a certain degree inform you regarding charger features to ensure your charger has because they all don't have the same features.
3 rules-of-thumb for best practice
- Don't discharge beyond 80% of rated capacity.
- Stop the recharge at 95% of capacity.
- Store packs at 3.80V/cell.
Don't discharge beyond 80% of rated capacity
If you fly or drive the model until it slows down noticeably you've almost certainly discharged the battery pack below 80% of capacity . . . and broken Rule of Thumb #1. This is bad because the battery gets hot when it's abused this way (and in general, heat is bad for batteries). The trick of not using more than 80% of a battery pack's capacity is to know approximately how much capacity you're using. Yes, this seems obvious but it isn't all that easy to know the answer.
A fuel gauge for your battery would be dandy. And if you're made of money, there are telemetry systems available from various radio manufacturers, which down-link pack info to your transmitter. This very nice, but what if you don't have such a system?
Fortunately, pack consumption can be estimated with a timer plus a charger, if the charger also informs regarding how many milliamps it replaces into the pack. Thus, in addition to buying a charger that will handle 8-cells if you operate models with 8-cells, an important feature is a readout regarding the number of milliamps the charger puts back into the battery pack. Bonus points if it breaks this information down cell-by-cell.
Armed with this information (number of milliamps returned to the pack) plus a watch to time your flights between take off and landing, you can determine if you're using more or less than 80% of pack capacity. Why the watch? Simple, if you flew 4 minutes and only used 50% of the pack's capacity you can set a timer in your transmitter to sound the alarm when it's time to land, perhaps allowing 30 seconds to land, and set it to 5:30. This will have you reasonably sure you won't break rule #1.
What if you want to fly longer? Simple, set the time to an extra minute and see how many milliamps are being put back in. If this is now 70% instead of 50%, you may be close enough, but you could add another 30 seconds to the timer and see if that puts you spot on the 80% mark. Now it becomes a game of how close can you get. Just don't exceed 80% because it degrades the battery and the number of cycles it will deliver will plummet. You've been warned.
Stop the recharge at 95% of capacity
Left to their own devices, a charger will peak the battery for 100% of capacity. Thing is, if you tell it to stop the charge at 95% capacity you get a bit less into the pack but it happens a lot faster than waiting for 100%. And it also doesn't abuse the battery as much. Our best advice is sacrifice that 5% for the greatly extended lifespan of your LiPo pack. Trust us temp-on this and just do it. Thus, a nice feature of your charger is the ability to tell it when to stop the charge. This can be either in % - or - in volts/cell. In a LiPo, 95% -$2= 4.15V/cell. How do you know this? Simple, just consult the chart below. Heck, maybe you'll want to print it out and tape it to your field box!
Store packs at 3.80V/cell
Another important feature in a charger is a storage cycle. Basically, it'll charge or discharge whatever pack you connect until it attains a set point measured in volts/cell. Often the desired value for storage is 3.80V/cell, but if you want to fine-tune this number, another feature to look for in a charger is the ability to set this value. Once again, consult the chart below.
Watt-meterMany folks use a Watt Meter and get an indication of the pack
voltage under load. This can be handy when determining how the pack
is standing up to use, or for determining when a pack is over the
hill, or whether the pack has a high enough C-rating for the purpose.
Fortunately, there's a poor man's way of determining a pack's state
of charge, or remaining capacity - and all you need is a digital
voltmeter plus this handy chart.
- Determine LiPo battery pack remaining capacity by measuring at rest voltage
Using the chart to determine the state of charge is easy. Simply measure the voltage after the pack's been at rest a few minutes, then based on the number of calls, scan down until you find the measured voltage, and then scan left to see the approximate capacity in % that's estimated to be remaining in your LiPo pack. Oh, and please feel free to print this page for your workshop (it's 1400px wide so it prints out nicely). Maybe even laminate it for posting at the flying field for others. All we ask is that you please leave our copyright notice (as attribution of your source) so that anybody who wants to know who did the work of generating this chart can find us.
And before you ask why cells rated at 3.7V can be charged to 4.2V, it's because the calls are rated at their nominal voltage, e.g. the approximate voltage they see under load. For the state of charge to be reasonably accurate, we need to measure unloaded voltage, and at rest, e.g. a brief period after it's been charged or discharged. Anyway, let's work through a few real world examples to help you learn what's important about the care and feeding of LiPo battery packs and how using this chart may help you.
A. Let's say you fly a 450-class helicopter with a 3S2200mAh battery pack (note, may be expressed as Ah, e.g. 2200mAh / 1hr = 2.2Ah). Calculating 80% of capacity is grade school math - it's just 2200mA x 0.8 = 1760mA. That's the max you want to use before recharging. Or put another way, you always want to leave 440mA in the pack (2200 - 1760 = 440). What follows is important because what you really want to know is; how long can I fly my model without discharging the battery pack too much? By rule of thumb, discharging below 20% of the capacity (440mA) is a no-no. The trick is to sneak up on the proper duration for that particular model based on how 'you' fly. Here's how.
Begin by setting the timer on the transmitter to a brief interval, like 3 minutes. Why not just fly the model until you feel the performance drop off and noting the time? Because by the time you can feel a reduction in power you've over-discharged the pack. And doing it even results in damage. Do it a lot and it becomes junk really quickly (and this is why you never, ever want to buy used battery packs, e.g. on the last day of a fun fly where there have been team pilots hammering on the packs whilst showing off a manufacturer's model and then offering the used packs cheaply because over-discharging is the kind of damage that's permanent and irreversible and leads to a significantly reduced lifespan for a LiPo battery pack – you've been warned). Anyway, after landing, wait a few minutes before measuring the pack-voltage. This is known as the 'at rest' voltage upon which the chart is based and waiting longer is better because the discharge process (or the charging process) disturbs the cells enough to affect things (but for our purposes, waiting a few minutes is good enough). Write the voltage down and recharge the pack.
While that's going temp-on, refer to the chart. Let's say you measured 11.6V (volts). Scan down to 11.61 volts (in the 3-cell column), then read left to where you'll see 60%. For confirmation; If the the charger says you've replaced 900mA, you're just about right temp-on the money because the calculation of 60% remaining capacity is 2200mA x 0.6 -$2$3$4= 1320mA, and 2200mA-1320mA = 880mA, or a bit less than half the capacity (e.g. you've used 40%). And 900mA is close enough to 880mA to call it good! Put another way, the state of charge of the pack is 60% remaining capacity.
If this were me, next I'd try increasing the timer to 4 minutes and go for another flight where I'd predict this time the charger would replace about 1200mA. Why? Because 900mA in 3 minutes is about 300mA/minute (900mA / 3min = 300mA/min). Based on that, then a 4 minute flight would likely result in replacing about 1200mA (300 x 4). If this holds true after measuring the at rest voltage and recharging, after this I'd try increasing the timer to 5 minutes and look for about 1500mA being put back in the pack. This, followed by a 6 minute timer setting. Anyway, if you land after 6 minutes and the charger says it's replaced 1800mA, you've gone a tad too far. Not enough to really damage the pack but you'd be smart to decrease the timer to 5-1/2 minutes. And note, experienced pilots pad the timer for the amount of time it takes them to set up and land. There's no one answer to this because, “it depends!”
So basically, through trial and error, you're going to zero in on the right amount of time you can fly any particular model based on how 'you' fly. Remember, the goal is discovering what flight time roughly equals 80%, or 1760mA (in this example) is being consumed from the pack because you don't want to over-discharge the pack. And never, never exceeding this is going to help you treat the packs right! Plus there's another benefit of sneaking up on the right duration - in the process you've been gently breaking in the packs. Yup, just like with an engine, battery packs benefit from a break in period . . . but that's a topic beyond the scope of this article.
Let's back up. What if you'd been impatient? What if you set the timer to 7 minutes because a buddy flies a similar model about that long on a 2200Ah pack? Well, at a rate of 300mA/minute you'd probably have used 2100mA. By consulting the chart, you'd see this was in the danger zone (marked in red). Yup, you'd have permanently damaged the battery pack right from the get go! This is why it's smarter to sneak up on the proper timer setting for each individual model based on how you fly it.
By the way, have you noticed how I keep mentioning how you fly versus how I fly, or how someone else flies? This is because most folks have a set routine when they fly. E.g. a particular series or types of maneuvers, which they typically like to perform. Thus, where one guy is happy to fly around in a race track pattern with an occasional roll or loop thrown in, another guy likes to fly straight up, then zoom down at full speed performing a low pass. The latter pilot is consuming more power more quickly, e.g. in less time. This means his timer setting or the exact same model should be different, e.g. adjusted for how he flies. Everybody is different.
Anyway, enough background on best practices for finding the 20% state of charge point. The real value of this chart lies in predicting the remaining capacity for a LiPo battery, e.g. before you charge it or store it away. Especially the latter. Why? It's because at the end of the day you want to have the pack at 3.80V/cell, or the optimum voltage for storage. This, because with experience we've learned storing a LiPo pack for the next time you want to go fly your model - at either a higher or lower voltage - leads to reduced service life (and the possibility of fire). And storing them fully charged isn't just dangerous because it may cause a fire but results in cells puffing. So to maximize service life and reduce fire risk, one of the rules of thumb is to always store the pack with the cells at the storage voltage. By the way, the state of knowledge about LiPo packs is always changing. I've read information by some very smart people indicating it may be better to store packs at 3.77V instead of 3.80V, and even 3.75V. However, until you know enough to be making these kinds of decisions, using 3.80V is my best advice. Meanwhile, here's another example where the chart is handy.
B. A guy with a crawler powers it with a 3S5000mAh pack. The fellow drives it until it slows down and wonders why he's having to frequently buy pricey battery packs. The guy at the hobby shop doesn't know (and maybe is happy selling packs). Fortunately, someone turns him temp-onto this article, he groks the idea, and he prints the chart to carry with him. Moreover, since it's his experience the truck slows down after about an hour of driving, after 45 minutes he stops, waits a bit, then measures the pack voltage. He discovers the pack's at 11.3V, or there's about 30% of capacity remaining (a state of charge of 30%). He wisely sets his transmitter's timer to 50 minutes, and after recharging he verifies he's indeed putting back about 4000mA (5000mAh x 0.8 = 4000mA for a 20% state of charge). Thus, by measuring resting voltage, then consulting the chart, he's now stopping when pack voltage is at 11.19V. But the chart is handy for more than this because it can help determine the health of the pack. Let's do another example.
C. A fellow has a model of a fighter jet with an 80mm impeller and flies it on a 6S5000mAh LiPo (a LiPo pack with 6-cells in Series that's 5.0Ah in capacity). From the chart he knows when drawing 80% of capacity it means the battery pack must have an 'at rest' voltage of no less than 22.38V (20%). He lands after 4 minutes and measures 22.26V and after consulting the chart sees this is in the yellow band. What's he do? Smart fellow that he is, he immediately resets his timer from 4 minutes to 3:45, recharges, and then goes out for another sortie. After landing, he measures 22.35V and again makes a timer adjustment, this time to 3:35 . . . yes, seconds matter. Later, driving home he ponders how he dodged a bullet because had he flown just another 30 seconds to a minute, he probably would have experienced a noticeable decrease in flight performance, e.g. he'd over-discharged the pack. And he'd probably encountered a battery pack that was more than warm, but downright hot from overly discharging it. And this last is an important detail. When you take the pack out of your model, feel the temperature with your hand. If it's hot, you're probably abusing it and/or need to use a higher C-rated pack (but again, this is information for another article so suffice to say, sometimes the simple things like feeling the temperature can give you valuable information). Anyway, had he over-discharged the pack he could have damaged something worth a couple of hundred dollars! Or put another way, he would have farted away some real money through carelessness. Permanently!
But there's more, because beyond learning where to set the timer for your model and landing immediately when it goes off, e.g. without dilly dallying, or making one more pass, but immediately setting up for landing, you're taking better care of your LiPo purchase! By the way, just like checking the battery temperature feels about usual after a flight, regularly verifying the timer setting is still correct (by measuring the at rest voltage vs. what the charger tells you it put back in) can help you predict when a pack is going over the hill. How? Simple, because it doesn't last as many minutes as it used to (and not just during one flight but when the voltage is consistently less than you've come to expect based on how you fly the model). Reduced duration when nothing else has changed may be the battery pack telling you it's done. Of course, if you're flying more aggressively than usual shorter duration may mean nothing in terms of pack health - it depends.
So let's say you determine the pack is 'tired'. Well, if you fly multiple types of models, this may be a great time to take a pack you've been using in a jet and re-purposing it into a sport model. Perhaps one with a prop where instead of draining it to 20% capacity in less than 4 minutes the model flies for 8 or 9 minutes. A more gentle discharge may be just what the doctor ordered. And re-purposed for a reduced duty environment, a pack may last a good while longer (e.g. when it's past its service life in a high performance model). Yet another example is how I've been using a 6S5000mAH pack that's way over the hill in terms of using it with a model, but it's been delivering yeoman duty for going on three years! Where? Strapped to the bottom of my 24V electric starter.
Bottom line? The chart is free, and using it can save you real money.