• Welcome to Tekno RC Forums! Are you a Tekno RC fan? If so you're in luck as you've have arrived to the biggest and best Tekno RC community.

    Come join our community and ask your questions, show off your Tekno RCs and share your experience!

Tbuggy's ET410

This site may earn a commission from merchant affiliate
links, including eBay, Amazon, and others.
Not sure if anyone noticed but I did once I did a test fit of the body. I installed the front body mounts on the wrong side of the shock tower.

All better now.
IMG_3856.JPG
 
Shocks!

Bag "K" and "L"
IMG_3775.JPG

IMG_3776.JPG


When placing all of the X-rings and spacers I do it like a parfait. First layer is grease, next an x-ring, then more grease, then the spacer (new update for the shocks), more grease, the second x-ring, then more grease followed by the last shock shaft guide. Once thats all in place put the lower cap on but don't tighten all the way.
IMG_3777.JPGIMG_3780.JPGIMG_3781.JPGIMG_3782.JPGIMG_3783.JPGIMG_3785.JPG
IMG_3786.JPGIMG_3787.JPGIMG_3788.JPG


Then put the shafts together. Use a very small amount of thread lock to the piston screw. I have broken these screws by accidentally using too much and then trying to remove them later to make adjustments. Don't over tighten these screws either. I went with the stock pistons for now. I have some blanks deleon ones but haven't decided how I want to drill them out yet so I wanted to test these first.
IMG_3791.JPG


After inserting the shaft into the shock body I tighten the bottom cap all the way. It will bottom out so I don't think you can really over tighten this part, at least not if you do it by hand. Then I put the shock end on and for the most part if you thread it all the way to the top of the threads it will be almost perfectly what the manual calls out for. Just check with some calipers to make sure they are the same.
IMG_3809.JPG


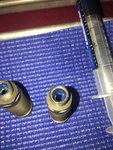
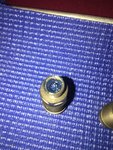
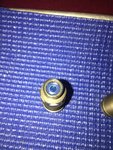
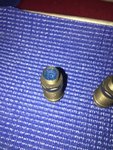
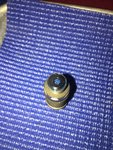
Quick trick for getting that tiny little o-ring onto the bleeder screw for the shock cap. place it on a soft mat like in my pic and then press the screw into the o-ring and tighten as you would when installing it. The soft mat will let the screw thru and keep the o-ring up.
IMG_3825.JPG

IMG_3826.JPG

IMG_3827.JPG


As far as the plastic shock caps...these went on super smooth without an issue at all! Maybe Tekno heard all the complaining and did something different I don't know, but I did not have one issue getting them to find the threads.
IMG_3832.JPG


Two tips when mounting the shocks;

First, when installing the rear shocks I found (from the eb410) that a 2mm spacer between the shock and arm helps push the shock out just enough that there will be no rubbing what so ever on the drive shaft.
IMG_3837.JPG


Second tip, don't over tighten the shock screws that go into the arms, especially the front ones. If you over tighten the front ones they will pinch the ball and inked it into the arm making almost impossible to remove if you want to later. I learned this the hard way on my eb410.
IMG_3835.JPG


There it is!
IMG_3838.JPG


Next wing, wheels and body!
 
Lets just wrap this one up here. Wing is self explanatory other than you will have to cut out a lot more than the cut line suggest to clear the shocks. I just got my Sworks wing I will be replacing this one shortly and save it while its still good for my EB410.
IMG_3892.JPG


I have been writting down the fluids viscosities used on the chassis...what else is there to do with all that blank space!
IMG_3891.JPG


All electronics are in and soldered up now.
IMG_3888.JPG

IMG_3889.JPG

IMG_3890.JPG


I decided to beef up the body because I have a feeling it will be helpful in prolonging the life of this body.
IMG_3893.JPG


Went with a metallic green and lots of sticker, because we know stickers make you faster!
IMG_3895.JPG

IMG_3897.JPG
 
I decided to see how the new aluminum Team Trinity parts work out with this ride. I purchased the rear hubs and the beefed up front camber plate. Depending on how I like the fitment I will probably get the steering rack next to go with it. Tracking says I will get it tomorrow so I will have some more to come then!
 
Last edited:
Another thing I noticed that could be cool if someone wanted to experiment with different bodies, there were the same set of holes on the rear tower for the body mounts that go in the front. So you could potentially mount a body that covers the rear tower as well, more like a traditional stadium truck style.

Rear tower:
IMG_3898.jpg


Front Tower:
IMG_3899.jpg
 
You do good work!! Im sure you spent more time on the pics that on assembly. It was exciting following your progress. Almost like doing myself with out the manual. Like the way you kept track of the oils on the chassis. no guess work. good catch on the front mounts being swapped and that they could possibly go on the rear.
 
You do good work!! Im sure you spent more time on the pics that on assembly. It was exciting following your progress. Almost like doing myself with out the manual. Like the way you kept track of the oils on the chassis. no guess work. good catch on the front mounts being swapped and that they could possibly go on the rear.

Thanx! And yes, the pics are really what extended the build (time wise) honestly. I could have had it built in a few hours the way I typically tackle projects. But I let this one drag out so I can document it...who knows maybe it will be handy in the future to look back on.

Thanks for checking it out. I plan on doing some running updates on this thread and possibly if I can, get some videos later on down the road posted up.
 
Installed the new Team trinity aluminum parts;
IMG_3900.jpg

IMG_3901.JPG


Everything fit pretty nicely. I did have to add an additional shim to get the play out from between the hub and the axle.
IMG_3902.JPG


Front camber plate installed;
IMG_3903.JPG
 
So I have been running this thing hard for the last few days and I love this truggy! It seems even easier to drive than the EB410, which is already a dream!

The ESC/motor combo I have been running (Team Orion R10 w/ Tekin pro4 4600)has been working really well. I run a fan on the ESC but may not really even be necessary. No fan at all will be needed IMO for the Pro4 4600. It has been coming off the track super cool to the touch no matter how hard I was driving it. Was contemplating bumping up to a 17t pinion, I am currently using a 16t and there are a few situations on the track that the tiny bit of extra speed may be helpful. Even running it with some super hard traxxas SCT tires it drives great! jumps, flies and lands great! It will tend to nose dive if you let off the throttle too much in the air, but thats fine I have gotten used to pushing these cars a little harder and it pays off for sure!

The track I am running it at is an outdoor loose dirt track...same one I run my EB48.3 at.
 
@TBuggy, thanks for the extremely detailed write-up and tips along the way. It made my build that much easier.
 
Thanks for posting this, it is a monster amount of work you did to share it. I havn’t Gotten my hands on an ET410 yet, I’m crossing my fingers that the Birthday bird (Doctor Seuss reference) has read my wishlist and is feeling generous! But when I do your build is going to be a huge help.
 
Thanks for posting this, it is a monster amount of work you did to share it. I havn’t Gotten my hands on an ET410 yet, I’m crossing my fingers that the Birthday bird (Doctor Seuss reference) has read my wishlist and is feeling generous! But when I do your build is going to be a huge help.

I will cross my fingers too for ya!
 
I just got some new shoes for my ET. I honestly never had an ST so I wanted to try out the different style wheels vs the SCT style I was previously running. Just glued them up last night so kinda anxious to hit the track and test them out!
IMG_4110.JPG
 
I got to this point and the diff does not spin as smoothly as I think it should. Almost like it’s binding up every few turns or so. Any suggestions?
Did you use shims? If so, you might want to remove one or all.
 

Recent Popular Liked

Back
Top