• Welcome to Tekno RC Forums! Are you a Tekno RC fan? If so you're in luck as you've have arrived to the biggest and best Tekno RC community.

    Come join our community and ask your questions, show off your Tekno RCs and share your experience!

410.3 2021 Racing Season

This site may earn a commission from merchant affiliate
links, including eBay, Amazon, and others.

Racer X

Active member
Messages
39
Reaction score
25
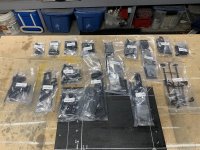
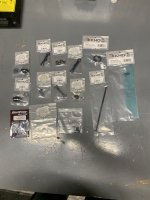
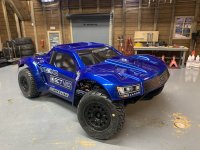
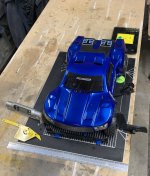
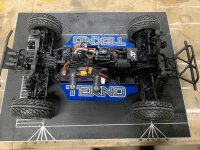
I finally picked up my SCT410.3 kit from my local hobby shop. At the same time I ordered a pile of stuff from A Main hobbies that the hobby shop did not have. Can’t wait to get started building this kit.
I’m building this as a pure short corse race truck for the local outdoor dirt track.
I have never raced an RC truck before so I have a lot to learn.
 

Attachments

  • E866581D-8CD4-41DD-A680-69F6195AAFA9.jpeg
    E866581D-8CD4-41DD-A680-69F6195AAFA9.jpeg
    171.2 KB · Views: 307
I just - today - finished up the basic build of my (first!) SCT410.3. I'm like you - new to racing - but I did mine as a desert racer ('DB-48').

I say that only to encourage you, because this thing is amazing! I am going to get another one to build as a racer. It is so far above my Losi Lasernut and TT Pro that it's not a fair comparison. I only drove one battery through it this afternoon, but I am smitten.

Enjoy it!
 
I have a bunch of upgrade parts on order so I can’t really start the build from the beginning. I’m going to use ceramic bearings throughout the build and save the original bearing set as back up in case of a failure.
I’m also replacing the A,B,C&D blocks and the shock tops with aluminum.
So I can only put together some sub assembly’s.
The first thing was the Receiver box. The antenna is not covered anyplace in the instructions. So I glued about seventy five millimeters to the top of the receiver case. Leaving about three millimeters sticking down into the hole in the bottom of the case. I ground a small cut out so the antenna did not get pinched into the antenna tube.
 

Attachments

  • 44B0340F-8036-4895-8FC7-3808045B3404.jpeg
    44B0340F-8036-4895-8FC7-3808045B3404.jpeg
    86.9 KB · Views: 309
  • F7EBBC6C-46A0-4012-929B-E3E2AE9D0D7E.jpeg
    F7EBBC6C-46A0-4012-929B-E3E2AE9D0D7E.jpeg
    91.8 KB · Views: 320
Putting together the steering and camber links. It is more difficult than I expected. Getting them so the line on the hex points toward the left side of the vehicle required more attention than I expected and had to redo one set. Fortunately I do have a nice 4 mm snap on wrench for the job.
 

Attachments

  • E902DDC7-6E9F-41EA-A58C-98ECBC7DB512.jpeg
    E902DDC7-6E9F-41EA-A58C-98ECBC7DB512.jpeg
    95.4 KB · Views: 277
A pile of parts arrived today. And I waisted some money. I have spent months reading everything I can find about the SCT 410.3 kit. And after unboxing the kit I found that Techno has upgraded some things. The problem is I ordered parts before I got the kit. That’s not really a problem because spare parts will be handy and I don’t mind having them.
The kit comes with an Aluminum drive shaft and aluminum 12mm hex hubs and the mount for the servo and the engine mount are also alloy.
the hex hubs I purchased came with shims. So I could use them to remove almost all the play from the hubs. Two shims made the hubs bind. One shim or no shims was perfect. Maybe later I will use more shims as things break in. But now I’m just waiting for the alloy differential carriers and the B and C block and I will have the whole roller assembled.
 

Attachments

  • 6C22987A-9A42-479F-8E37-75CA2DB65832.jpeg
    6C22987A-9A42-479F-8E37-75CA2DB65832.jpeg
    100.7 KB · Views: 295
Your going to love the truck! I just recently got back into rc and have been beating my 410.3 almost daily at the local outdoor track. The truck just takes it like a champ. I think it is the best value rc kit on the market.
 
I am already loving this truck. There are so many details. Like getting the steering links perfectly parallel. And setting the travel limit. I removed the upper plate and moved the steering right and left until I could see the vertical rods flex under bind. Then backed it off just enough to get the movement perfectly between full lock without bind. After I get the suspension together I can fine tune it to get the amount of right and left perfectly symmetrical. Once I start driving it I can set the rates and exponential.
I picked up a body. I went with the proline Flo-Tek Fusion clear pre cut body. And picked up a set of the street fighter tires premounted. The wheels have a removable hub and they come with two sets of hubs so I can adjust the offset.
these are for display and testing. For racing wheels I will get beadlocks and whatever tires are appropriate for the track conditions. At 100 dollars for a set of four that is an expense that will probably have to wait. I am still waiting on some parts and still up in the air about the motor.
I like my Castle Mamba X speed control. But I’m open for suggestions. My first choice is the Castle 3800kv motor. Probably the best choice. But I am leaning on the Tekin Pro4 4300kv motor because it’s a 550 and might run cooler in the summer.
 
Made some progress. I’m still waiting for the B and C blocks. They should be in soon. But I got the differentials built. And I did not use any shims. Even with one shim there was a ruff spot when turning the pinion shaft. I think I will run it then check it again later.
I got the rest sorta mocked up just to look at it on its wheels.
And see how the body looks. This is a big truck compared to my crawlers.
 
Made major progress on the build. WOW this thing is cool.
I am totally in love with this truck.
I like picking it up about a foot off the table and dropping it. It hits the table like a piece of clay. Just thud no bounce at all.
Still need a motor and pinion gears and I have to paint it.
I did get the body mounted so I can start painting it this weekend.
I think I’m going with a Castle 3800 kv motor and the Mamba X ESC. If it is not enough for this rig it will work in a 2wd buggy. I wish Tekno built a 2wd buggy. But I might have to get an Associated RC10b6.2D. But that is a long way off. So I’ll run the Castle set up for now.
 
I finished my set up. Everything is set to the book. I want to add lock nuts on the body posts and my ride height is a little higher than spec but that could be the tires.
I managed to get a coat of paint on the body. So I’ll start laying the rest of that up over the weekend.
I just love the drop test.


Attachments

  • 64C1B624-AF7E-4AC2-B073-F81207CC5DD1.jpeg
    64C1B624-AF7E-4AC2-B073-F81207CC5DD1.jpeg
    178.5 KB · Views: 310
The love affair continues. This kit has been so much fun to build. I’m sorry it’s coming to an end but excited to drive it and start tuning and practicing.
 

Attachments

  • A7A96BC4-BE8B-4998-AE81-E81A361B7BBB.jpeg
    A7A96BC4-BE8B-4998-AE81-E81A361B7BBB.jpeg
    145.9 KB · Views: 314
I made a set of mud guards for the rear suspension. Just simple polycarbonate scraps that have the proline logo molded into them. I left them clear so they are practically invisible.
 

Attachments

  • 3B44AB64-799E-4F03-8465-4DFB11D5F59B.jpeg
    3B44AB64-799E-4F03-8465-4DFB11D5F59B.jpeg
    159.5 KB · Views: 310
Great Job, very handsome looking car. I'm still in love with mine too ;-)
Getting the ABCD alu blocks next month and I also put on the alu shock caps.
Also ordered some new hinge pins.

After driving in wet and not attending to them after, I had some sqeeking caused by rusty hinge pins.
Scotch-brite "sanded" them up lightly , cleaned the hole in the arms and rock solid again.
Bearings we're still all right after wet driving.

I wonder what you think about the airguards.
I have not yet seen the necessity yet to drill holes in my body for parachuting issues.
Jumps like a king on the tracks I run, without any airholes. I use a proline evo sc body.
Wondering what your experiences will be.
 
still saving up for the motor so I can’t drive it yet. Just pushing it around on the floor making vroom-vroom noises at this point.
I got the body pre cut. And not very well cut I must say. But, good enough.
I did not put any lube on my hinge pins. I was a little worried about that. On the one hand I like to prevent rust and like to lube things that move. But the plastic should lube things and the lube collects dirt. There is a little for and aft play. Maybe some thin O rings to keep water out and take out the play would be a god idea.
 
Another piece of aluminum jewelry arrived in the mail today. This is a steering support block. Probably don’t need it but it looks cool and makes the front end now totally ridged aluminum on ceramic bearings.
 

Attachments

  • F6995508-C2D1-48FF-8081-CBEC3AF85102.jpeg
    F6995508-C2D1-48FF-8081-CBEC3AF85102.jpeg
    121.8 KB · Views: 315
I was a little concerned about the amount of for and aft movement of the lower control arms. Everything on this truck is so precise that it seems like there should not be any play. Maybe I am wrong but I put two small O rings on the front of the hinge pins and two on the back of the rear hinge pins and this holds everything stable but does not bind at all. And it will keep dirt and water out of the hinge pins. I don’t think it will be water proof but I don’t expect to get wet anyhow.
 

Attachments

  • C55D87C5-FCC3-41A1-B9F6-53814746B5FF.jpeg
    C55D87C5-FCC3-41A1-B9F6-53814746B5FF.jpeg
    110 KB · Views: 306
I want the truck to be as consistent as possible. So I want the wheel alignment and chassis set up to be measured and adjusted as best as I can.
I made a set up board and collected all the tools I need. The suspension is set according to the specifications layed out in the build instructions.
toe front and rear.
Camber front and rear.
Caster front.
body hight.
corner spring weight .
Now that I have that as the base line. Any modifications can be made a little at a time
 

Attachments

  • 35747425-2C2F-48B9-B24D-568BB446E7DE.jpeg
    35747425-2C2F-48B9-B24D-568BB446E7DE.jpeg
    138.1 KB · Views: 300
I was a little concerned about the amount of for and aft movement of the lower control arms. Everything on this truck is so precise that it seems like there should not be any play. Maybe I am wrong but I put two small O rings on the front of the hinge pins and two on the back of the rear hinge pins and this holds everything stable but does not bind at all. And it will keep dirt and water out of the hinge pins. I don’t think it will be water proof but I don’t expect to get wet anyhow.
I use thin plastic teflon washers. They won't bind at all, where as a rubber o-ring could.
 
I finally got the motor and the basic rig is finished. It seems solid. The pro4 motor is a beast.
 

Attachments

  • 1EC21C8F-929B-4F55-93F1-526B649DCD63.jpeg
    1EC21C8F-929B-4F55-93F1-526B649DCD63.jpeg
    174.2 KB · Views: 329

Recent Popular Liked

Back
Top